


Moving various objects is often used in mobile games and various multimedia applications. In this article, we will look at how to add images to the screen and move them freely.
To do this, we need to perform the following steps:
- Create layout with the FrameLayout component.
- Create an ImageView programmatically for the added image and set it to OnTouchListener
- Define user actions in the onTouch() method
- Change LayoutParams values according to the current ImageView location
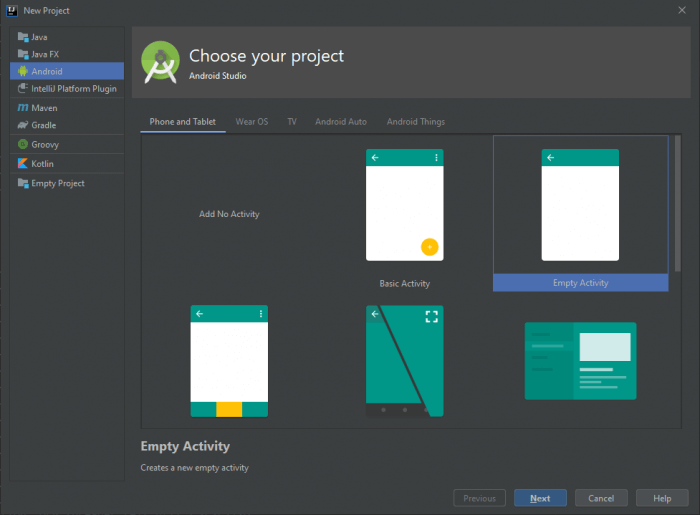
First, create a new project with empty activity.
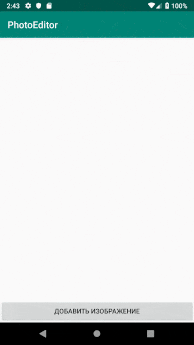
In the activity_main.xml layout, delete the old layout and replace it with the new one. In this case, FrameLayout will be used as a container for added images.
<?xml version="1.0" encoding="utf-8"?>
<RelativeLayout
    xmlns:android="http://schemas.android.com/apk/res/android"
    xmlns:tools="http://schemas.android.com/tools"
    android:layout_width="match_parent"
    android:layout_height="match_parent"
    android:orientation="vertical"
    tools:context=".MainActivity"
    >

  <FrameLayout
      android:id="@+id/container"
      android:layout_width="match_parent"
      android:layout_height="match_parent"
      android:layout_above="@id/btn_add"
      android:layout_alignParentTop="true"
      />

  <Button
      android:id="@+id/btn_add"
      android:layout_width="match_parent"
      android:layout_height="wrap_content"
      android:layout_alignParentBottom="true"
      android:text="Добавить изображение"
      />

</RelativeLayout>
Define the created layout elements in the MainActivity code.
public class MainActivity extends AppCompatActivity {
  private FrameLayout container;

  @Override protected void onCreate(Bundle savedInstanceState) {
    super.onCreate(savedInstanceState);
    setContentView(R.layout.activity_main);
    container = findViewById(R.id.container);
    Button btn_add = findViewById(R.id.btn_add);
  }
To select and crop added images, we use the uCrop library, which can be found on GitHub. Implement it by adding the following lines to the project’s build.gradle file:
allprojects {
  repositories {
    ...
    maven { url "https://jitpack.io" }
  }
}
Then, in the build.gradle file of the app module, you need to implement the library itself:
implementation 'com.github.yalantis:ucrop:2.2.5-native'
After that, you need to register library activity in the AndroidManifest.xml of the application.
<activity
    android:name="com.yalantis.ucrop.UCropActivity"
    android:screenOrientation="portrait"
    android:theme="@style/Theme.AppCompat.Light.NoActionBar"/>
Now you need to get images to add to the application. With the help of intent, we call the file manager, with which we find the appropriate images on the device. To do this, set up button click handler as follows.
@Override protected void onCreate(Bundle savedInstanceState) {
  super.onCreate(savedInstanceState);
  ...
  btn_add.setOnClickListener(new View.OnClickListener() {
    @Override public void onClick(View view) {
      Intent intent = new Intent(Intent.ACTION_GET_CONTENT);
      intent.setType("image/*");
      startActivityForResult(intent, REQUEST_IMAGE);
    }
  });
}
To get the Uri of the selected file, you need to override the onActivityResult() method in the activity code, adding the following code to it:
@Override
protected void onActivityResult(int requestCode, int resultCode, @Nullable Intent data) {
  if (resultCode == RESULT_OK) {
    switch (requestCode) {
      case REQUEST_IMAGE: {
        if (data != null && data.getData() != null) {
          startCrop(data.getData());
        }
        break;
      }
    }
  }
}
private void startCrop(Uri data) {
  String name = getFileName(data);
  File file = new File(getCacheDir(), name);
  filename = name;
}
The getFileName() method is used to get the file name from Uri, you can see it in the source code of the project later.
When we have the Uri of the selected file, we can use the uCrop library to crop the image as we need. This can be done using the following lines in the startCrop() method.
private void startCrop(Uri data) {
  ...
  UCrop uCrop = UCrop.of(data, Uri.fromFile(file));
  uCrop.start(this);
}
After calling start(), library activity will open in which you can work with the image. As soon as the work is finished, the intent with the Uri of the cropped image will return to our activity. In this case, it will be easier for us to access the file itself, since its path and name are known. You can get it all in the same onActivityResult() as follows.
@Override
protected void onActivityResult(int requestCode, int resultCode, @Nullable Intent data) {
  if (resultCode == RESULT_OK) {
    switch (requestCode) {
      ...
      case UCrop.REQUEST_CROP: {
        createImageView();
        break;
      }
    }
  }
}

private void createImageView() {
  File file = new File(getCacheDir(), filename);
  Bitmap bmp = BitmapFactory.decodeFile(file.getAbsolutePath());
  ImageView imageView = new ImageView(MainActivity.this);
  FrameLayout.LayoutParams params = new FrameLayout.LayoutParams(250, 250);
  params.leftMargin = 0;
  params.topMargin = 0;
  imageView.setLayoutParams(params);
  imageView.setImageBitmap(bmp);
  container.addView(imageView);
  file.delete();
}
Here we immediately create a new ImageView, to which we set the size and load the Bitmap obtained from the file into it.
Now images are simply added to the screen and you can’t interact with them in any way. To handle touches for images, we add the OnTouchListener variable to the activity code, in which the onTouch() method will be overrided. This method allows you to catch various touches and gestures, but we only need the following user actions:
- User touched image;
- The user moves a finger across the screen;
- The user removed his finger from the screen;
Thus, the processing code will look like this:
private int xDelta, yDelta;
private View.OnTouchListener touchListener = new View.OnTouchListener() {
  @Override public boolean onTouch(View view, MotionEvent event) {
    final int x = (int) event.getRawX();
    final int y = (int) event.getRawY();

    switch (event.getAction() & MotionEvent.ACTION_MASK) {
      case MotionEvent.ACTION_DOWN: {
        FrameLayout.LayoutParams lParams = (FrameLayout.LayoutParams) view.getLayoutParams();

        xDelta = x - lParams.leftMargin;
        yDelta = y - lParams.topMargin;
        break;
      }
      case MotionEvent.ACTION_UP: {
        Toast.makeText(getApplicationContext(), "Объект перемещён", Toast.LENGTH_SHORT).show();
        break;
      }
      case MotionEvent.ACTION_MOVE: {
        if (x - xDelta + view.getWidth() <= container.getWidth()
            && y - yDelta + view.getHeight() <= container.getHeight()
            && x - xDelta >= 0
            && y - yDelta >= 0) {
          FrameLayout.LayoutParams layoutParams =
              (FrameLayout.LayoutParams) view.getLayoutParams();
          layoutParams.leftMargin = x - xDelta;
          layoutParams.topMargin = y - yDelta;
          layoutParams.rightMargin = 0;
          layoutParams.bottomMargin = 0;
          view.setLayoutParams(layoutParams);
        }
        break;
      }
    }
    container.invalidate();
    return true;
  }
};
Here we determine the current coordinates of the image when the user touches it, then calculate the change in coordinates and update them in the image when the user removes a finger from the image. There is also a condition due to which the image should not go beyond the screen.
Now all that remains is to set this touch handler for the created ImageView in createImageView().
private void createImageView() {
  ...
  imageView.setOnTouchListener(touchListener);
  container.addView(imageView);
  file.delete();
}
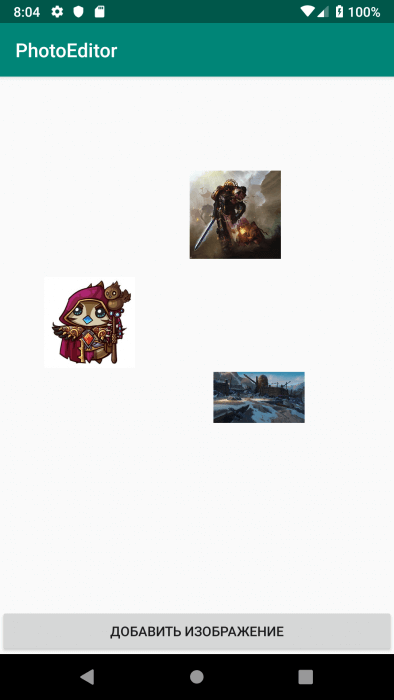
That’s all. Now, by launching the application, we can freely move images around the screen.
Thus, with a few lines of code, you can create a simple application for interacting with images on the screen.
You can view the source code of the application by clicking on the link to GitHub.