


I’d like to take a break from all these frameworks, engines and ready-made libraries. More precisely, do not rest, and strain yourself – to take and program a toy solely with the help of standard tools. Which one? It’s easy to choose, because in the heart of any programmer there are always three games created in the last century: Tetris, Digger and Xonix.
By the way, this article makes sense to read even if you do not plan to breathe a new life into the games of our childhood, because the real purpose of this material is to show you the work with the canvas, fonts, graphic objects, streams, standard application architecture and inheritance.
Instrumentation and logic
We will develop the development in the recommended Google Android Studio. All that we need is easy to find by reference.
Create an empty project and add all the classes manually. The whole game will consist of five activity classes, four of which we will describe in the manifest, and the fifth one will be the parent for all previous ones, that is, all activity classes will be inherited from one – so less code will be obtained. Start the application will be SplashActivity, it will after a time delay cause MainMenuActivity, from there you can go into SettingsActivity settings or run the main part of the game, located in GameActivity. All activities (except the last) will implement their interface in the most standard of all ways, namely the description of the elements in XML layout files.
The main game field will be drawn on the successor of the SurfaceView class. Rendering will be performed in parallel to the main UI-stream. Now consider the class that was not included in the manifest, but it will save us a lot of code and time.
BaseActivity class
To ensure that the device screen does not turn off while the application is running, create the BaseActivity class and inherit the Activity application from it:
public class BaseActivity extends Activity {
  @Override
  protected void onCreate(Bundle savedInstanceState) {
    super.onCreate(savedInstanceState);
    // The headline was deleted
    requestWindowFeature(Window.FEATURE_NO_TITLE);
    // Removed the screen shutdown and set the full screen mode
    getWindow().addFlags(WindowManager.LayoutParams.FLAG_TURN_SCREEN_ON | WindowManager.LayoutParams.FLAG_DISMISS_KEYGUARD
      | WindowManager.LayoutParams.FLAG_SHOW_WHEN_LOCKED | WindowManager.LayoutParams.FLAG_KEEP_SCREEN_ON |
      WindowManager.LayoutParams.FLAG_FULLSCREEN);
    // Set the portrait orientation
    setRequestedOrientation(ActivityInfo.SCREEN_ORIENTATION_LANDSCAPE);
    // Set animation when activity starts
    overridePendingTransition(android.R.anim.slide_in_left, android.R.anim.slide_out_right);
  }
}
This class will provide us with activity without title, with a portrait orientation, not dying out due to energy saving screen and animation of the appearance of each new activity.
Welcome screen
Google does not recommend the use of the Splash Screen in applications. But the recommendation does not mean a ban, I really want to show how it’s done, so we implement it with a simple SplashActivity class:
public class SplashActivity extends BaseActivity {
  @Override
  protected void onCreate(Bundle savedInstanceState) {
    super.onCreate(savedInstanceState);
    setContentView(R.layout.activity_splash);
    new Handler().postDelayed(new Runnable() {
      @Override
      public void run() {
        startActivity(new Intent(SplashActivity.this, MainMenuActivity.class));
        finish();
      }
    }, 2000);
  }
}
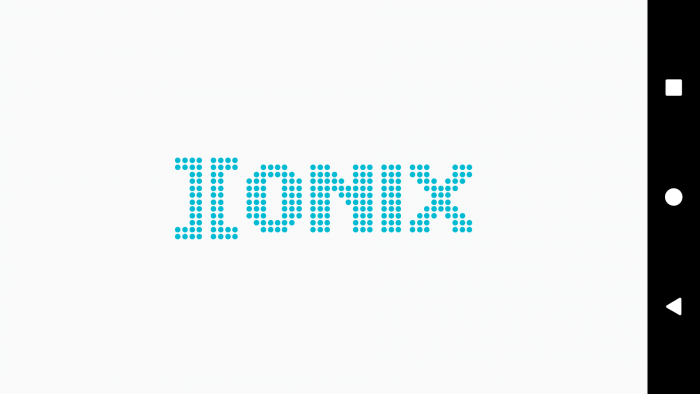
Here we just show our markup setContentView(R.layout.activity_splash). After 2000 ms, we run MainMenuActivity, and turn it off using the finish() method. It should be noted that the welcome screen is useful when you need to prepare for the application, for example, to copy the database or quickly download something from the Web.
Well, at this time, the user should show a nice logo – no matter how parsimonious, the average user even likes this expectation, he will have an impression that the application is serious, since it takes something long to read before the start. This is used by some developers: they show the rotating wheels (ProgressBar) before running, although nothing useful is being done at this moment.
To bring some beauty and originality, we can use TTF and OTF fonts. You can apply them in two ways:
- Dynamically, that is, while the application is running, set the desired font to the desired font using the setTypeface () method.
- Statically – redefining the standard display component and setting it in a markup file.
In our application, both methods will be implemented. Put the font file Dots.ttf in the assets folder. The layout of the first two screens is implemented statically. To do this, create a class MyTextView, the heir from the standard TextView. Set the style in the attrs.xml file.
The main method of the class init():
private void init(AttributeSet attrs) {
  if (attrs != null) {
    TypedArray a = getContext().obtainStyledAttributes(attrs, R.styleable.MyTextView);
    String fontName = a.getString(R.styleable.MyTextView_fontName);
    if (fontName != null) {
      Typeface myTypeface = Typeface.createFromAsset(getContext().getAssets(), fontName);
      setTypeface(myTypeface);
    }
    a.recycle();
  }
}
In the activity_splash.xml markup let’s assign our class:
<com.rusdelphi.xonix.MyTextView
  android:layout_width="wrap_content"
  android:layout_height="wrap_content"
  android:layout_centerHorizontal="true"
  android:layout_centerVertical="true"
  android:text="@string/app_name"
  android:textSize="40sp"
  android:textStyle="bold"
  customfont:fontName="Dots.ttf" />
We apply our font dynamically, while drawing text on the playing field.
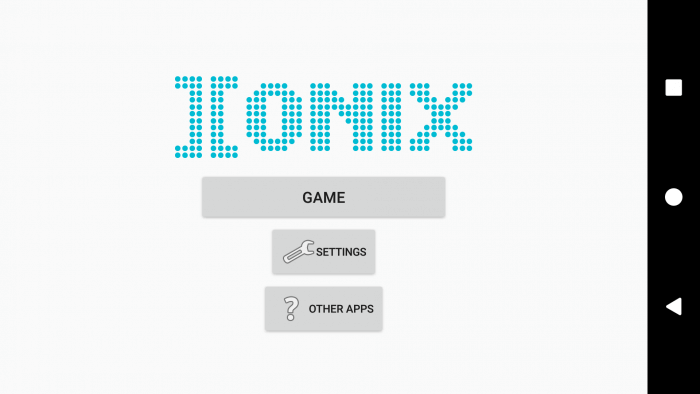
In the main menu we implement three buttons: the game itself, settings and other applications. Let’s start with the latter. In order to give the user the opportunity to enjoy other applications of the author, it is enough to write one line – a search query with the author’s name:
startActivity(new Intent(Intent.ACTION_VIEW, Uri.parse("market://search?q=pub:Cool author")));
That is, we launch the program through certain intent.
The application must handle the Uri with the string market. The system itself determines by description in the manifest, which applications can handle this intent, and, if there are several, will offer a choice.
Before publishing the application in the market: Do not forget to use a good tool to clean the project, which is included in the Android Studio Name it Analyze – Inspect Code. As a result, you will get a list of found remarks in the project – from unused resources to unnecessary variables. Take into account these comments, optimize the project!
Settings (SettingsActivity) use the standard mechanism SharedPreferences. All settings are made in a separate Preference class. When the activity starts (onStart()) with the settings, we load the necessary settings into the controls. If we change the settings, they will be saved when they exit the activity (onStop()). In the settings we indicate the speed of the game and the number of lives at the start of the game process.
Game activity GameActivity is also the heir of BaseActivity. From the parent, she inherited all the above-described useful properties, so that we can only realize the game itself. During the creation of this activity, instead of the usual indication of an XML file with layout elements, let’s point out for the screen our own class DrawView, which is the successor of SurfaceView:
@Override
  protected void onCreate(Bundle savedInstanceState) {
  super.onCreate(savedInstanceState);
  self = this;
  ctx = this;
  mDrawView = new DrawView(this);
  setContentView(mDrawView);
  DisplayMetrics dimension = new DisplayMetrics();
  getWindowManager().getDefaultDisplay().getMetrics(dimension);
  int width = dimension.widthPixels;
  int height = dimension.heightPixels;
  if (width < height)
    mSidePopup = (int) (width * 0.8);
  else
    mSidePopup = (int) (height * 0.8);
}
Here we get the parameters of the screen (wight, height), which we will use when creating a popup window (PopupWindow) with a message about the end of the game.
SurfaceView class
SurfaceView is a wrapper around the SurfaceHolder class, which in turn serves as a wrapper for the Surface class used to update an image from background threads. A feature of the SurfaceView class is that it provides a separate area for drawing, the actions of which must be taken out in a separate application thread. Thus, the application does not need to wait until the system is ready to draw the entire hierarchy of View-elements. The auxiliary thread can use the canvas (Сanvas) of our SurfaceView to draw at the speed that is needed.
The whole implementation is reduced to two main points:
- Create a class that is inherited from SurfaceView and implements the SurfaceHolder.Callback interface.
- Create a thread that will manage the rendering.
Canvas class
The Canvas class provides methods for drawing that display graphic primitives on the original raster image. At the same time, you first need to prepare a brush (class Paint), which allows you to specify how the graphic primitives should be displayed on the raster image (color, stroke, style, font smoothing, and so on). You also need to specify Bitmap – the surface on which the drawing takes place. Android supports translucency, gradient fills, rounded rectangles and anti-aliasing. Due to resource constraints, vector graphics are not yet supported, instead, traditional raster redrawing is used.
The Canvas class can be called a wrapper around a raster image, which we will use as a canvas for our artistic experiments. It provides a set of methods of the form draw* for creating images of cats and other objects.
DrawView class
In the DrawView class, we will catch the events of clicking on the screen (onTouchEvent) and start the working flow DrawThread, which implements all the game logic and works with the canvas. The monster in the game moves itself, but the player needs to be controlled. By simple calculations we define four gestures:
@Override
public boolean onTouchEvent(MotionEvent touchevent) {
  switch (touchevent.getAction()) {
    // Determine the coordinates of the first touch
    case MotionEvent.ACTION_DOWN: {
      x1 = touchevent.getX();
      y1 = touchevent.getY();
      break;
    }
    case MotionEvent.ACTION_UP: {
      x2 = touchevent.getX();
      y2 = touchevent.getY();
      float dx = x2 - x1;
      float dy = y2 - y1;
      if (Math.abs(dx) > Math.abs(dy)) {
        if (dx > 0)
          DrawThread.playerDirection = "right";
        if (dx < 0)
          DrawThread.playerDirection = "left";
      } else {
        if (dy > 0)
          DrawThread.playerDirection = "down";
        if (dy < 0)
          DrawThread.playerDirection = "up";
      }
      break;
    }
  }
  return true;
}
In the surfaceCreated() method, we get the elements for the canvas and start the flow of drawing, and in surfaceDestroyed(), on the contrary, we finish it:
@Override
public void surfaceCreated(SurfaceHolder holder) {
  Preference prefs = new Preference(getContext()); // Received settings
  int indent = Tools.dpToPx(5); // Indent between elements
  int side = (getWidth() / 40) - indent; // The size of the square
  int startY = (getHeight() - (side + indent) * 20) / 2;
  int startX = 5;
  int i, j;
  for (i = 0; i < 40; i++)
    for (j = 0; j < 20; j++) {
      int x1 = startX + side * i + indent * i;
      int y1 = startY + side * j + indent * j;
      int x2 = startX + side * i + side + indent * i;
      int y2 = startY + side * j + side + indent * j;
      if (i == 0 || i == 39 || j == 0 || j == 19)
        matrixField[i][j] = new QuadrateItem(x1, y1, x2, y2, Color.BLUE);
      else
        matrixField[i][j] = new QuadrateItem(x1, y1, x2, y2, Color.TRANSPARENT);
    }
  Activity activity = (Activity) getContext();
  drawThread = new DrawThread(getHolder(), getResources(), matrixField,prefs.getData(Preference.GAME_SPEED),prefs.getData(Preference.NUMBER_OF_LIFES),activity);
  drawThread.setRunning(true);
  drawThread.start();
}

@Override
public void surfaceDestroyed(SurfaceHolder holder) {
  boolean retry = true;
  drawThread.setRunning(false);
  while (retry) {
    try {
      drawThread.join();
      retry = false;
    } catch (InterruptedException e) {
    }
  }
}
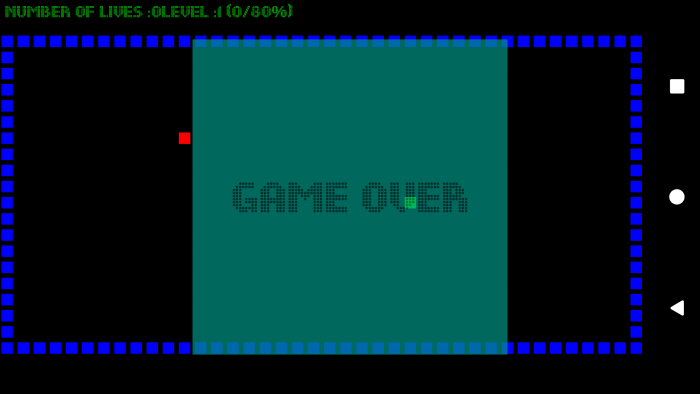
Our playing field consists of an upper inscription and a matrix of squares 40 x 20, in which the whole play drama will unfold.
All the drawing is done on the canvas, that is, on the Canvas class. In the stream, we get it:
canvas = surfaceHolder.lockCanvas(null);
Draw on it:
canvas.drawColor(Color.BLACK);
or:
public void drawRect(Canvas canvas, QuadrateItem item) {
  Rect myRect = new Rect();
  myRect.set(item.x1, item.y1, item.x2, item.y2);
  Paint itemPaint = new Paint();
  itemPaint.setColor(item.color);
  itemPaint.setStyle(Paint.Style.FILL);
  canvas.drawRect(myRect, itemPaint);
}
And return it updated:
surfaceHolder.unlockCanvasAndPost(canvas);
The logic of the game, I think, is unnecessary to describe. If the number of lives is less than one, then we will show Game Over – the end screen.
Conclusion
In our time there are many tools for developing games for Android, including online editors. Their job is to turn JavaScript code into an application with a WebView component, that is, a regular browser. It should be noted that the JS itself in the Android OS has been cut, it can not go beyond the browser’s sandboxes, and therefore does not have access to many of the functions of the device itself. Not already talking about browser errors, which is updated only on the latest versions of the OS. In general, about such crafts in a decent society is better to remain silent. Working with frameworks imposes errors on the programmer’s mistakes on the platform itself, which ultimately leads to a number of problems, often even unsolvable. Therefore, if you want to make a good game, you need to stay closer to the platform and take the standard tools (more than a controversial statement, but it sounds brutal.) – Ed.).