


Nowadays, the most popular and convenient ways to read are electronic books. They can be taken with you anywhere, they save paper, the display of text in them can be customized as convenient for the human. For these reasons, many e-book formats have appeared, the main ones being EPUB, FB2 and MOBI. The well-known DOC and TXT are also electronic book formats, but their capabilities are very limited compared to the above. Each of the formats has its own advantages, but the most commonly used are EPUB and FB2, and the second one is popular only in Russia.
One of the features of these formats is that they need a special program that can work with a specific format. Therefore, in the App Store or Google Play you can find a large number of different readers for all known formats. In this article we will try to write our own e-book reader. For this purpose, we will use a special SDK from the developers of FBReader, which is available at the following link.
In September last year, FBReader released their own SDK for Android, which allows you to create your own readers based on it. FBReader SDK has great functionality, which includes the following features:
- Opening any e-book files (ePub, fb2, mobi, etc)
- Reading metadata from a book file
- Features of the FBReader engine
- Possibility to change book text style
In addition, the library provides various additional features for implementation in applications, such as:
- Text selection
- Bookmarks
- Text Search
- Table of contents
- Additional text navigation
- Footnotes and hyperlink support
- Brightness adjustment
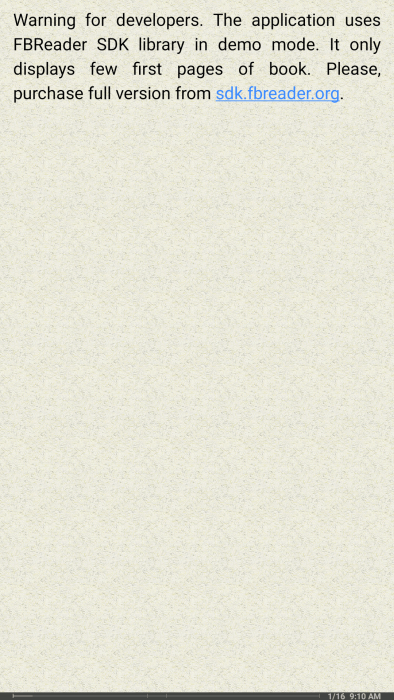
Separately, it is worth noting that, although the FBReader SDK can be downloaded from the site for free, after implementing it in the application, it will work in demo mode, which has full functionality, but shows only the first few pages of the book. In order to get the full version of the library, you need to buy it on the developer’s website and, following the instructions, get a special key for SDK, which should be added to the application.
In this article, we will look at how to create your own e-book reader based on the FBReader SDK and see its capabilities.
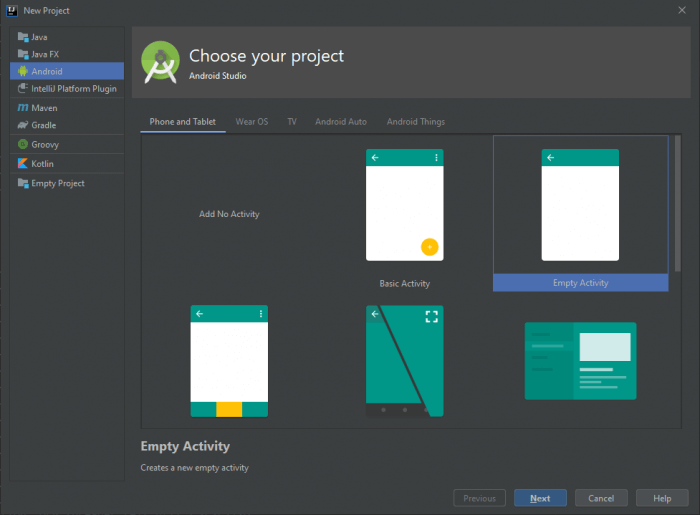
Let’s start by adding an SDK to your project. To do this, create a new project with empty activity. We will specify API 16 as the minimum API.
In the build.gradle file of the project module, add a link to the allprojects block for downloading the libraries we need.
allprojects {
    repositories {
        ...
        maven {
            url "https://sdk.fbreader.org/maven"
        }
    }
}
Then, in the build.gradle file of the app module, add the dependencies with libraries to the dependencies block.
dependencies {
    ...
    implementation 'com.googlecode.json-simple:json-simple:1.1'
    implementation 'org.fbreader:book:1.0.3'
    implementation 'org.fbreader:config_client:1.0.3'
    implementation 'org.fbreader:config_provider:1.0.3'
    implementation 'org.fbreader:filesystem:1.0.3'
    implementation 'org.fbreader:fontentry:1.0.3'
    implementation 'org.fbreader:format_interface:1.0.3'
    implementation 'org.fbreader:image:1.0.3'
    implementation 'org.fbreader:intent:1.0.3'
    implementation 'org.fbreader:language:1.0.3'
    implementation 'org.fbreader:loader:1.0.3'
    implementation 'org.fbreader:options:1.0.3'
    implementation 'org.fbreader:text_client:1.0.3'
    implementation 'org.fbreader:text_provider:1.0.3'
    implementation 'org.fbreader:text_util:1.0.3'
    implementation 'org.fbreader:text_view:1.0.3'
    implementation 'org.fbreader:toc:1.0.3'
    implementation 'org.fbreader:util:1.0.3'
    implementation 'org.fbreader:view:1.0.3'
    implementation 'org.fbreader:vimgadgets:1.0.3'
    implementation 'org.fbreader:zip-amse:1.0.3'
}
As you can see, the library “com.googlecode.json-simple: json-simple:1.1” is also present here. It will come in handy a bit later for working with JSON files.
There are a lot of libraries included in the FBReader SDK, but they are divided so that you can connect only those that are needed for a particular case.
In the same file, in the android block, add the following lines, which should ensure the successful assembly of the project.
android {
  ...

  compileOptions {
    sourceCompatibility JavaVersion.VERSION_1_8
    targetCompatibility JavaVersion.VERSION_1_8
  }
}
On the SDK website, developers also provide source code for various components that simplify the implementation of the interface. Download it and add it to the project. To do this, transfer the fbreader folder from there to the folder of our project. After that, in the settings.gradle file, we will write this folder and the paths to the necessary modules.
include 'fbreader_extras'
project(':fbreader_extras').projectDir = new File('fbreader/extras')
include 'fbreader_styles'
project(':fbreader_styles').projectDir = new File('fbreader/styles')
include 'fbreader_text_extras'
project(':fbreader_text_extras').projectDir = new File('fbreader/text_extras')
Now add the dependencies with them in the build.gradle file of the app module.
dependencies {
  ...
  implementation project(':fbreader_extras')
  implementation project(':fbreader_styles')
  implementation project(':fbreader_text_extras')
}
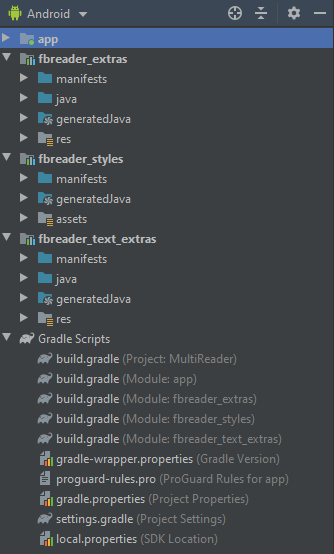
When the IDE rebuild the project, we will see the added modules in the list on the left.
On this, the SDK connection is completed and you can proceed to directly create the application. At the end of the article, we should get a simple reader with two activities, one of which will display a list of e-books on the device, and the second will open the selected file.
Let’s start with the layout. For MainActivity, add the RecyclerView to the screen, which will contain the actual list of files. To do this, add the following code to the layout/activity_main.xml file.
<?xml version="1.0" encoding="utf-8"?>
<RelativeLayout
    xmlns:android="http://schemas.android.com/apk/res/android"
    xmlns:tools="http://schemas.android.com/tools"
    android:layout_width="match_parent"
    android:layout_height="match_parent"
    tools:context=".MainActivity"
    android:paddingRight="12dp"
    android:paddingLeft="12dp"
    >

  <androidx.recyclerview.widget.RecyclerView
      android:layout_width="match_parent"
      android:layout_height="match_parent"
      android:layout_marginTop="6dp"
      android:id="@+id/rv_files"
      />

</RelativeLayout>
Now initialize this object in the activity code. Open the MainActivity.java file and add the following code.
public class MainActivity extends AppCompatActivity {
  private RecyclerView rvFiles;

  @Override
  protected void onCreate(Bundle savedInstanceState) {
    super.onCreate(savedInstanceState);
    setContentView(R.layout.activity_main);
    rvFiles = findViewById(R.id.rv_files);
    rvFiles.setLayoutManager(new LinearLayoutManager(this));
  }
}
In order to work with files stored on the device, we will need to request special permission. Add the following permissions to the AndroidManifest.xml application manifest.
<manifest xmlns:android="http://schemas.android.com/apk/res/android"
    package="ru.androidtools.multireader">

  <uses-permission android:name="android.permission.READ_EXTERNAL_STORAGE"/>
  <uses-permission android:name="android.permission.WRITE_EXTERNAL_STORAGE"/>

  <application
      android:allowBackup="true"
      android:icon="@mipmap/ic_launcher"
      android:label="@string/app_name"
      android:roundIcon="@mipmap/ic_launcher_round"
      android:supportsRtl="true"
      android:theme="@style/AppTheme">
    <activity android:name=".MainActivity">
      <intent-filter>
        <action android:name="android.intent.action.MAIN"/>

        <category android:name="android.intent.category.LAUNCHER"/>
      </intent-filter>
    </activity>
  </application>

</manifest>
Starting with API 23, this permission must be requested in runtime. To do this, when starting the application, we will check the version of Android on the device and, if necessary, send the user a request for permission.
public class MainActivity extends AppCompatActivity {
  ...
  private static final int REQUEST_PERMISSION = 101;

  @Override
  protected void onCreate(Bundle savedInstanceState) {
    super.onCreate(savedInstanceState);
    setContentView(R.layout.activity_main);
    rvFiles = findViewById(R.id.rv_files);
    rvFiles.setLayoutManager(new LinearLayoutManager(this));

    if (Build.VERSION.SDK_INT >= Build.VERSION_CODES.M) {
      checkPermission();
    } else {
      generateList();
    }
  }

  @TargetApi(Build.VERSION_CODES.M) private void checkPermission() {
    if (ContextCompat.checkSelfPermission(this, Manifest.permission.WRITE_EXTERNAL_STORAGE)
        == PackageManager.PERMISSION_GRANTED) {
      generateList();
    } else {
      ActivityCompat.requestPermissions(this,
          new String[] { Manifest.permission.WRITE_EXTERNAL_STORAGE }, REQUEST_PERMISSION);
    }
  }
}
You can get the query result by overriding the onRequestPermissionResult() activity method. If permission has been granted to the application, continue to work.
@Override public void onRequestPermissionsResult(int requestCode, @NonNull String[] permissions,
    @NonNull int[] grantResults) {
  switch (requestCode) {
    case REQUEST_PERMISSION: {
      if (grantResults.length > 0 && grantResults[0] == PackageManager.PERMISSION_GRANTED) {
        generateList();
      }
      break;
    }
  }
}
In the generateList() method, we will search for the necessary files on the device and display them in the application list. To do this, create AsyncTask, which will do all the work in a separate thread and return a ready-made list with the found files. Add the following code to MainActivity.
private void generateList() {
  List<StorageBean> storageBeans = StorageUtils.getStorageData(this); // retrieving list of mounted memory cards on this device
  List<String> paths = new ArrayList<>();
  if (storageBeans != null) {
    for (StorageBean storageBean : storageBeans) {
      paths.add(storageBean.getPath());
    }
  } else {
    String path = Environment.getExternalStorageDirectory().getAbsolutePath();
    paths.add(path);
  }
  ListFilesTask listFilesTask = new ListFilesTask(paths);
  listFilesTask.setListener(new ListFilesTask.ListFilesListener() {
    @Override public void onTaskCompleted(List<File> files) {
    }
  });
  listFilesTask.execute();
}

static class ListFilesTask extends AsyncTask<Void, Void, List<File>> {
  public interface ListFilesListener {
    void onTaskCompleted(List<File> files);
  }

  private ListFilesListener listener;
  private List<String> startPaths;
  private List<File> files;
  private boolean completed;

  public ListFilesTask(List<String> startPaths) {
    this.startPaths = new ArrayList<>(startPaths);
    this.files = new ArrayList<>();
    this.completed = false;
  }

  public void setListener(ListFilesListener listener) {
    this.listener = listener;
    if (completed && listener != null && files != null) {
      listener.onTaskCompleted(files);
    }
  }

  @Override protected List<File> doInBackground(Void... voids) {
    List<File> fileList = new ArrayList<>();
    for (String s : startPaths) {
      searchFiles(fileList, new File(s));
    }
    return fileList;
  }

  @Override protected void onPostExecute(List<File> files) {
    completed = true;
    if (listener != null) {
      listener.onTaskCompleted(files);
    } else {
      this.files = new ArrayList<>(files);
    }
  }

  private void searchFiles(List<File> list, File dir) {
    String epubPattern = ".epub";
    String fb2Pattern = ".fb2";

    File[] listFiles = dir.listFiles();
    if (listFiles != null) {
      for (File listFile : listFiles) {
        if (listFile.isDirectory()) {
          searchFiles(list, listFile);
        } else {
          if (listFile.getName().endsWith(epubPattern) || listFile.getName()
              .endsWith(fb2Pattern)) {
            list.add(listFile);
          }
        }
      }
    }
  }
}
The result must be displayed. To do this, we need an adapter for the RecyclerView and a model in which the data of the list items will be stored. Let’s create a simple BookFile class in which we will store the file name and path to it on the device.
public class BookFile {
  private String filename, path;

  public BookFile(String filename, String path) {
    this.filename = filename;
    this.path = path;
  }

  public String getFilename() {
    return filename;
  }

  public String getPath() {
    return path;
  }

  @Override public int hashCode() {
    return filename.hashCode() + path.hashCode();
  }

  @Override public boolean equals(Object obj) {
    if (obj instanceof BookFile) {
      BookFile bookFile = (BookFile) obj;
      return this.filename.equals(bookFile.getFilename()) && this.path.equals(bookFile.getPath());
    }
    return false;
  }
}
Now we need an adapter into which we will load the list. Add layout for the list item. To do this, create the file layout/file_list_item.xml and add the following code to it.
<?xml version="1.0" encoding="utf-8"?>
<LinearLayout
    xmlns:android="http://schemas.android.com/apk/res/android"
    android:id="@+id/item_layout"
    android:layout_width="match_parent"
    android:layout_height="wrap_content"
    android:layout_marginBottom="2dp"
    android:layout_marginTop="2dp"
    android:orientation="vertical"
    android:paddingBottom="6dp"
    android:paddingLeft="16dp"
    android:paddingRight="16dp"
    android:paddingTop="6dp"
    >

  <TextView
      android:id="@+id/tv_filename"
      android:layout_width="match_parent"
      android:layout_height="wrap_content"
      android:text="filename"
      android:textSize="16sp"
      />

  <TextView
      android:id="@+id/tv_path"
      android:layout_width="match_parent"
      android:layout_height="wrap_content"
      android:layout_marginTop="2dp"
      android:text="path"
      android:textSize="14sp"
      />

</LinearLayout>
Now create the BooksAdapter class, which will extends from RecyclerView.Adapter<>. In it, we need to initialize the list items by loading the paths and file names of e-books into them. Thus, the adapter code will look as follows.
public class BooksAdapter extends RecyclerView.Adapter<BooksAdapter.BookHolder> {
  public interface BookListener {
    void onBookOpen(BookFile bookFile);
  }

  private BookListener listener;
  private List<BookFile> books;

  public BooksAdapter(List<BookFile> books, BookListener listener) {
    this.books = new ArrayList<>(books);
    this.listener = listener;
  }

  @NonNull @Override public BookHolder onCreateViewHolder(@NonNull ViewGroup parent, int viewType) {
    View view =
        LayoutInflater.from(parent.getContext()).inflate(R.layout.file_list_item, parent, false);
    return new BookHolder(view);
  }

  @Override public void onBindViewHolder(@NonNull BookHolder holder, int position) {
    BookFile bookFile = books.get(position);
    holder.bind(bookFile);
  }

  @Override public int getItemCount() {
    return books.size();
  }

  class BookHolder extends RecyclerView.ViewHolder {
    private LinearLayout itemLayout;
    private TextView tvPath, tvName;

    public BookHolder(@NonNull View itemView) {
      super(itemView);
      itemLayout = itemView.findViewById(R.id.item_layout);
      tvName = itemView.findViewById(R.id.tv_filename);
      tvPath = itemView.findViewById(R.id.tv_path);
    }

    public void bind(BookFile bookFile) {
      tvPath.setText(bookFile.getPath());
      tvName.setText(bookFile.getFilename());
      itemLayout.setOnClickListener(new View.OnClickListener() {
        @Override public void onClick(View view) {
          listener.onBookOpen(bookFile);
        }
      });
    }
  }
}
In addition, an interface is thrown between the activity and the adapter, with which we will transfer the file that the user wants to open to the activity.
Return to the main activity. In the generateList () method, we run AsyncTask and attach a listener to it, which should call the onTaskCompleted () method when it finishes. In this method, we need to make a list, sort it by name and pass it to the adapter. Add the following code here:
listFilesTask.setListener(new ListFilesTask.ListFilesListener() {
  @Override public void onTaskCompleted(List<File> files) {
    if (!isFinishing()) {
      List<BookFile> bookFiles = new ArrayList<>();
      for (File f : files) {
        BookFile bookFile = new BookFile(f.getName(), f.getAbsolutePath());
        if (!bookFiles.contains(bookFile)) bookFiles.add(bookFile);
      }
      Collections.sort(bookFiles, new Comparator<BookFile>() {
        @Override public int compare(BookFile bookFile, BookFile t1) {
          return bookFile.getFilename().compareToIgnoreCase(t1.getFilename());
        }
      });
      rvFiles.setAdapter(new BooksAdapter(bookFiles, new BooksAdapter.BookListener() {
        @Override public void onBookOpen(BookFile bookFile) {

        }
      }));
    }
  }
});
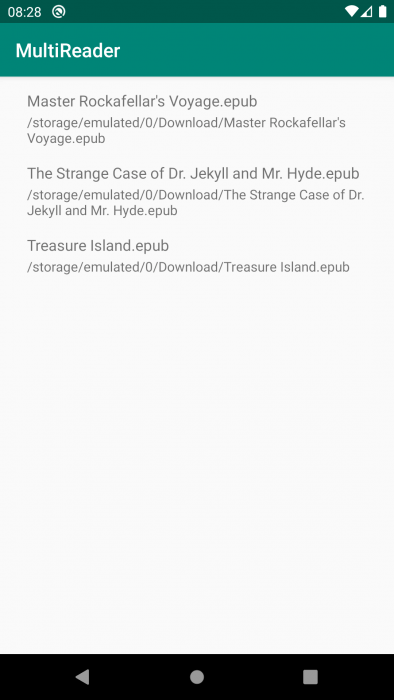
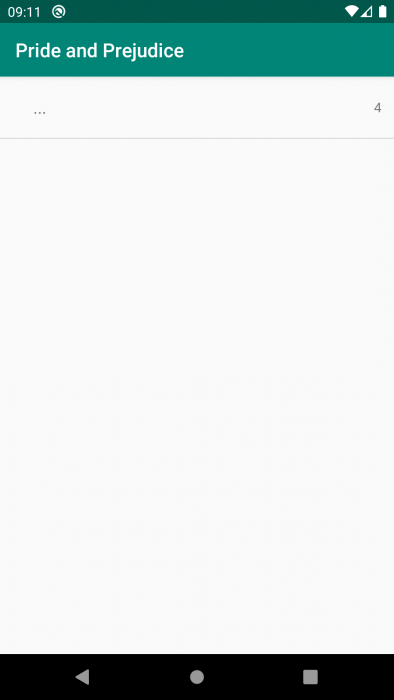
Now, by launching the application, we can see the list of e-book files that are on the device.
However, we need to open and read this file, and the FBReader SDK will help us with this. Create a new activity, call it ReaderActivity. Now, from the downloaded source code, we need several classes. Open samples/extensions src/main in the source folder and copy the res folder to the entire project, with the exception of res/layout/main.xml, and copy all classes except MainActivity.java from java/org/fbreader/sample/extensions. These classes contain ready-made components that will help us in creating the reader, if desired, they can be modified in accordance with the needs.
Now open layout/reader_activity.xml and add the following markup code to it.
<?xml version="1.0" encoding="utf-8"?>
<RelativeLayout
    xmlns:android="http://schemas.android.com/apk/res/android"
    android:id="@+id/widget_container"
    android:layout_width="match_parent"
    android:layout_height="match_parent"
    >

  <ru.androidtools.multireader.TextWidgetExt
      android:id="@+id/text_widget"
      android:layout_width="match_parent"
      android:layout_height="match_parent"
      android:focusable="true"
      android:scrollbars="vertical"
      android:scrollbarAlwaysDrawVerticalTrack="true"
      android:fadeScrollbars="false"
      />

  <TextView
      android:id="@+id/error_message"
      android:textAppearance="?android:attr/textAppearanceLarge"
      android:layout_width="wrap_content"
      android:layout_height="wrap_content"
      android:layout_centerInParent="true"
      android:text="The app couldn't open the book"
      android:visibility="gone"
      />

</RelativeLayout>
TextWidgetExt is a wrapper of the TextWidget library class, this class is the main one and it displays the contents of the book.
We initialize these objects in the activity code ReaderActivity.java.
public class ReaderActivity extends AppCompatActivity {
  private TextWidgetExt widget;

  @Override
  protected void onCreate(Bundle savedInstanceState) {
    super.onCreate(savedInstanceState);
    setContentView(R.layout.activity_reader);

    widget = findViewById(R.id.text_widget);
    View errorView = findViewById(R.id.error_message);
    widget.setVisibility(View.VISIBLE);
    errorView.setVisibility(View.GONE);
  }
}
We should get the path to the file that the user wants to open from the main activity. To do this, we will transfer the intent from one activity to another, containing the desired path. Return to MainActivity.java and add the code for creating the intent to the onBookOpen() method of the adapter interface.
rvFiles.setAdapter(new BooksAdapter(bookFiles, new BooksAdapter.BookListener() {
  @Override public void onBookOpen(BookFile bookFile) {
    Intent intent = new Intent(MainActivity.this, ReaderActivity.class);
    intent.putExtra(ReaderActivity.EXTRA_PATH, bookFile.getPath());
    startActivity(intent);
  }
}));
After that, we need to get the sent intent in ReaderActivity.java when the activity starts. Save a file path to onCreate().
...
public final static String EXTRA_PATH = "EXTRA_PATH";
private String filepath;

@Override
protected void onCreate(Bundle savedInstanceState) {
  super.onCreate(savedInstanceState);
  setContentView(R.layout.activity_reader);

  widget = findViewById(R.id.text_widget);
  View errorView = findViewById(R.id.error_message);
  widget.setVisibility(View.VISIBLE);
  errorView.setVisibility(View.GONE);

  filepath = getIntent().getStringExtra(EXTRA_PATH);
  }
}
We pass the resulting path to the setBook() method of the TextWidgetExt object. After that, it should return the Book object to us, which can be obtained using the TextWidgetExt controller() method. If the object is not null, then the content loading was successful and you can show the book to the user.
...
private TextWidgetExt widget;

@Override
protected void onCreate(Bundle savedInstanceState) {
  super.onCreate(savedInstanceState);
  setContentView(R.layout.activity_reader);

  ...

  try {
    widget.setBook(BookLoader.fromFile(filepath, this, 1L));
    Book book = widget.controller().book;
    if (book != null) {
      widget.invalidate();
      widget.post(new Runnable() {
        @Override public void run() {
          widget.gotoPage(0);
          setTitle(book.getTitle());
        }
      });
    } else {
      errorView.setVisibility(View.VISIBLE);
    }
  } catch (BookException e) {
    e.printStackTrace();
    errorView.setVisibility(View.VISIBLE);
  }
}
Now, if you run the application, we can already see the contents of the book, scroll through it and work with it.

However, this is not all the functionality that this SDK is capable of. Earlier we added resource files: various layouts, icons and menus. Add a menu to our application, for this in ReaderActivity.java we will override onCreateOptionsMenu() method and add the following code to it.
@Override
public boolean onCreateOptionsMenu(final Menu menu) {
  getMenuInflater().inflate(R.menu.app, menu);
  return true;
}
We also override onPrepareOptionsMenu() and onOptionsItemSelected() methods to work with this menu.
@Override
public boolean onPrepareOptionsMenu(final Menu menu) {
  SearchView searchView = (SearchView) menu.findItem(R.id.menu_search).getActionView();
  searchView.setOnQueryTextListener(new SearchView.OnQueryTextListener() {
    @Override
    public boolean onQueryTextChange(String query) {
      return true;
    }

    @Override
    public boolean onQueryTextSubmit(String query) {
      widget.searchInText(query);
      menu.findItem(R.id.menu_search).collapseActionView();
      return true;
    }
  });

  menu.findItem(R.id.menu_table_of_contents).setEnabled(TableOfContentsUtil.isAvailable(widget));
  String name = widget.colorProfile().name;
  menu.findItem(R.id.menu_color_profile_light).setChecked("defaultLight".equals(name));
  menu.findItem(R.id.menu_color_profile_dark).setChecked("defaultDark".equals(name));
  menu.findItem(R.id.menu_color_profile_dark_with_bg).setChecked("darkWithBg".equals(name));
  menu.findItem(R.id.menu_color_profile_pink).setChecked("pink".equals(name));
  return true;
}

@Override
public boolean onOptionsItemSelected(MenuItem item) {
  BaseStyle baseStyle = widget.baseStyle();

  switch (item.getItemId()) {
    case R.id.menu_table_of_contents: {
      final Intent intent = TableOfContentsUtil.intent(widget);
      if (intent != null) {
        startActivityForResult(intent, REQUEST_TABLE_OF_CONTENT);
      }
      break;
    }
    case R.id.menu_zoom_in:
      baseStyle.fontSize.setValue(baseStyle.fontSize.getValue() + 2);
      break;
    case R.id.menu_zoom_out:
      baseStyle.fontSize.setValue(baseStyle.fontSize.getValue() - 2);
      break;
    case R.id.menu_color_profile_light:
      widget.setColorProfileName("defaultLight");
      break;
    case R.id.menu_color_profile_dark:
      widget.setColorProfileName("defaultDark");
      break;
    case R.id.menu_color_profile_dark_with_bg:
      widget.setColorProfileName("darkWithBg");
      break;
    case R.id.menu_color_profile_pink:
      widget.setColorProfileName("pink");
      break;
  }
  widget.clearTextCaches();
  widget.invalidate();
  return true;
}
Thus, we add to the reader a menu that allows us to:
- Change text size
- Change text style
- Search by text
- Open table of contents
Regarding the table of contents, it is worth saying separately. In the code taken from the library, the table of contents is presented as a separate activity, we copied it earlier, but did not add it to the manifest. Therefore, open the manifest file AndroidManifest.xml and register a new activity in it.
<application
    android:allowBackup="true"
    android:icon="@mipmap/ic_launcher"
    android:label="@string/app_name"
    android:roundIcon="@mipmap/ic_launcher_round"
    android:supportsRtl="true"
    android:theme="@style/AppTheme">
  ...
  <activity android:name=".TableOfContentsActivity"/>
</application>
Now, when you open the table of contents through the menu, we will start a new activity containing the table of contents of the opened book. It is worth noting that not all books contain such a table of contents, so in such cases the menu button will be inactive.
When you select a chapter, you will be taken to the page that this chapter points to. To get this result, in ReaderActivity.java we will override the onActivityResult() method to which we will add the following code.
public class ReaderActivity extends AppCompatActivity {
  private final int REQUEST_TABLE_OF_CONTENT = 1;

  ...

  @Override
  protected void onActivityResult(int requestCode, int resultCode, Intent data) {
    switch (requestCode) {
      case REQUEST_TABLE_OF_CONTENT:
        if (resultCode == RESULT_OK) {
          int ref = data.getIntExtra(String.valueOf(TableOfContentsUtil.Key.reference), -1);
          if (widget != null && ref != -1) {
            widget.jumpTo(new FixedPosition(ref, 0, 0));
          }
        }
      default:
        super.onActivityResult(requestCode, resultCode, data);
    }
  }
As you can see, the library provides developers with all its functionality, the only limitation of the free version here is that it opens only the first few pages of the book, which is mentioned when the book is opened.
If you bought the key for SDK and want to add it to your application, you will need to add the following code in the buildTypes block in the build.gradle file of the app module.
buildTypes {
  ...

  all {
  resValue 'string', 'fbreader_sdk_key', 'put your fbreader sdk key here'
  }
}
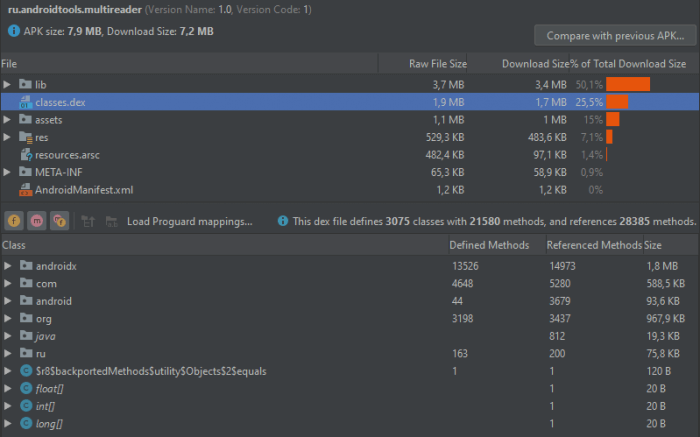
Despite the fact that the FBReader engine is quite powerful, and also considering the graphic resources added with the library, the final APK turned out to be small, which indicates good library optimization.
So, with the help of the FBReader SDK and a small amount of code, we were able to create a simple e-book reader. You can already leave it as it is, or continue to modify, changing the interface and design as the developer needs. Moreover, the SDK is not only on Android, but also on iOS.